Showing posts with label OUGD201. Show all posts

Tuesday, 23 November 2010

End of Module Evaluation

What skills have you developed through this module, and how effectively do you think you have applied them?
Considering the start of the brief took place when we where handed our summer work, I would say that I have strengthened my research skills and without doubt improved the way I document them. Over the summer I tried to differentiate the methods of documentation and I feel this has helped me so much when it came to applying the research to design work. I tried to not only gather written information but visual at the same time. In terms of the time we have been back on the course my knowledge of print processes and computer programmes has rapidly increased. The range of different sessions we have had, whether on illustrator and photoshop with Mike or type layout with Graham, have helped me to become a better designer. I am now more considerate of the decisions I make and am wary if there may be any consequences of my idleness in the future. For example I now know how to get the exact colour I am working with on screen to be the one that is printed out, a skill that may seem minimal, but in fact has a major impact on my end resolutions.

What approaches to/methods of design practice have you developed and how have they informed your design development process?
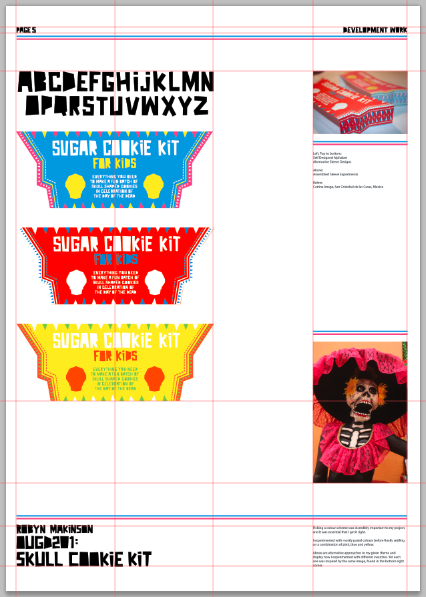
Obviously this brief is entitled 'Production for Print', so I have learned all about the different aspects of design that help with the last stage in production; print. One major piece of knowledge that I have picked up on this year is the creation and use of swatches. I probably should have been using them all along but only really discovered how to use them to their optimum potential in the sessions with Mike. I think it has been vital for this brief, especially since I have been working with such limited colours to create as much variety as I can. They are so quick to create and are definitely something I will use in every single future brief.

What strengths can you identify in your work and how have/will you capitalise on these?
I feel that I have increased confidence with regards to my work. Often in crit groups I have been commended on my style and the effort I put in. This may sound like I am being boastful, however it could not be further from the truth. I have always previously doubted myself, and probably always will in some way, but I do feel like I have made a clear step forward with this brief. My only hope is that I continue with this attitude in the future, along with my new found motivation for blogging. I've realised it can be quite enjoyable when you keep on top of your work and post almost every day, rather than leaving everything until the last minute.

What weaknesses can you identify in your work and how will you address these more fully?
In the early stages of the brief the main focus was with research and all the component that surround this area. When it came to getting back in the swing of things in terms of design work, I freely admit that I fell behind. I did not know where to begin, it was almost as if I had forgotten everything I had learnt in the first year. Another reason behind this may have been a lack of motivation. I say it every time but for the next brief I truly believe that I can improve my work ethic and create pieces of design that have been thoroughly explored and analysed before being committed to print. Another area where I fall down is finding my place within the studio atmosphere. Rather than going around the room and asking for peoples opinions and advice on my work, I struggle to come up with my own feedback and perhaps this is why I pursue one idea rather than realising when something isn't working and starting over. Fingers crossed I find my place within the next brief.

Identify five things that you will do differently next time and what do you expect to gain from doing these?
  • Don't concentrate on design context, and then design practice. Instead link the two together and try to make them flow into one another more freely.
  • Don't be afraid to ask peoples opinions on my work. Realise they are only going to give me helpful criticism rather than totally rubbishing my attempts.
  • Keep a diary and time manage more effectively. If I write goals down then stick to these goals, don't lose the piece of paper they were written on and just assume I have done everything.
  • Don't be afraid to begin the design process. If I am ever struggling in the future I know to get out my A3 pad and a pen and begin to draw ideas. In other words, step away from the computer.
  • When people give you advice in crits, don't just skip over it and try as quickly as possible to move on to the next person. Make sure you understand what is being said, which in turn will help with key decisions  and could ultimately decide on the success of my final outcome.
Are there any things we could have done differently that would have benefited your progress?
Perhaps made clear from the beginning the time period we have left. This is completely my fault, but when I hear the brief is lasting 6 weeks I assume that is a lot of time, when it really isn't. The 'harsh truth' briefings actually really helped to mobilise me, and I have realised that in order to become motivated its as if I need the pressure. For example the 'Wrap it Up' brief made me realise just how much work was possible within a week. It was incredibly useful and I saw it as the time when I shifted gears into overdrive.

Attendance: 4
Punctuality: 5
Motivation: 4
Commitment: 4
Quantity of work produced: 4
Quality of work produced: 4
Contribution to the group: 3


Monday, 22 November 2010

Final Boards Artwork

Below are my absolute final designs for my five presentation boards. As you can see this is artwork that is completely ready to be sent to print with all the necessary printers marks visible. These include: trim marks, registration marks and colour bars. These pieces of information help the printer when it comes to the last stage of production.


Artwork for Printing


Final Presentation Boards

For my next step in creating my 5 X A2 presentation boards I decided to go back to paper and pen and experiment with layout. I decided I would use my blue and pink colours to create strokes at opposite ends of the page. I also decided to place the page number above the top strokes and to the left, keeping them as small as possible. After my final crit I realised the type layout wasn't great at the bottom, as the length of line was far too long. I helped to correct this by splitting the text into columns, two to be more specific. Below are my revised drawings of what I am aiming for.


Once I had layout ideas in my head it was then all about finding the appropriate imagery. I had to take my final assembled product and capture it from all different angles. Some shots have far more detail than others, which are simplistic and straight to the point. I worked on a simple grid system, as I feel too many lines can be distracting and due to the large amount of variations it can almost look as if there was not grid to begin with. I revised my board intentions and settled on the following themes: board one - product shot, board two - opening the package, board three - the internal contents, board four - in context within a kitchen and board five - a little bit of development. Below are screen captures of my five final boards with the grid lines I worked with also visible.


Design Boards

In order to start with designing my boards I decided to hand render a range of layout ideas. Obviously when the sketches are this small it's hard to fully gage what the proportions will look like when blown up to A2 size. All the designs are based around the use of large scale images and as little type as possible. As you can see I also have used strokes at the top and bottom of every page, almost as if I am framing what is shown on page. Below are scans of my ideas.


After initial sketches I went on to design larger scale ones that depict the images in slightly greater detail. As you can see I aim to have a clear subject displayed on each one of the five boards. The first one is a simple large scale product shot, the second being shots of individual items within the product, the third being screen shots of digital development, whilst the fourth deals with hand drawn development. At this point in time I'm not sure what the fifth board will deal with, I'm thinking a little bit of inspiration and perhaps my product in context.


For my final crit I had to have first drafts of my five presentation boards designed. I used mock ups of my product to create the necessary imagery and my self designed alphabet for sub headings and page numbers. I printed the boards off on A3 paper in black and white to save money, and in my crit I was faced with quite helpful feedback. It became apparent that my last 'inspiration board' was unnecessary and instead I should have a greater wealth of product shots, including ones that show the intricate details of my designs. The group liked how I placed strokes at the top and bottom, however one criticism was that they did not have enough flare. I think I can deal with this next time by injecting more colour.


Assembling Final Products

Today I had a session booked in the print room for my final resolutions. Below are a few images of the different aspects of my final packaging. The first image is of my 'decorational items' packaging, printed onto 115gsm tracing paper. I chose tracing paper for these particular nets because I would like for the customer to be able to see what is inside the bags, without necessarily having to open them up. The second image is of a brand new scalpel I bought in order to ensure neat, clean lines on all of my final nets. An essential!


Below are my final seven icing tube nets, before assembly. As you can see I chose to go with a colour scheme that ran within the rest of the packaging, rather than assign each icing tube with the appropriate colour. I think I chose to have the pastel blue as the main colour as it not too vibrant and therefore painful on the eyes. Instead the really bright yellow and pink are left for highlighting and enhancing.


Below is an image of what the two parts of my sleeve looked like when cut out as precisely as possible and then scored and folded in all the right places. Obviously this picture may make no sense to someone who was not as involved with the design process as I was, however when the two nets are brought together, all becomes clear. The image below that shows the detail of the designs on the edges of the sleeve, and the high contrast between the blue and pink, with a nice yellow intermission.


Amid the mess on my desk below are probably the two most vital components of my product. On the left is the fully cut out net for the bottom half of my product, and on the right is the top half. This image was obviously taken before I scored and folded all the edges in on themselved to create a solid piece of design.


Lastly is an image of me using a large ruler and an incredibly sharp scalpel to shred some yellow tissue paper that I purchased. This shredded paper would then be placed within the bottom of my packaging, to act as 'padding' whilst also adding a nice aesthetic. I thought of this idea when researching kids baking kits and found that it was a popular choice. Evidence of this can be found here.

Thursday, 18 November 2010

Icing Tubes

Within this post I am addressing the issue of whether to use my chosen blue, pink and yellow colour palette on my icing tube or the corresponding colours to the icing inside each tube. Initially I had thought that I would use orange for orange and green for green etc. but now am realising this won't look right with the rest of my package. So therefore below are a few experiments with my three main colours, trying to show as much differentiation as possible.


I have definitely decided on using the three chosen colours, and below shows further experimentation with these. The designs are more intricate than others I have previously worked with, and I think I like them a lot more. I'm not sure which one out of the three I like the best, although I do feel using the yellow as the main colour may be a little overwhelming and the text also seems to be washed out slightly.


Final Colours

Below you can see screen captures of the final composition and colour scheme that I am going with. The top image is of the bottom half of the packaging with the back side of the sleeve places strategically over where it will sit when fully constructed. Because it is the back of the package I have kept the detail as minimal as possible so as not to distract from the intricacy on the front. The bottom half obviously has to be slightly smaller in measurement due to the fact that the top has to slide nicely over the top without it being too tight or having too much wiggle room.


The next image shows the front of the package and how the front side of the sleeve fits over the top. As is evident, I have decided to go with blue as the predominant colour with pink, white and yellow acting as highlighting colours. I am proud of my final designs and think they work very well in appealing to children whilst still fitting within the constraints of making it look sophisticated for the parents. Also the bright and colourful nature relates very well to my original inspiration, Mexican culture.

Tuesday, 16 November 2010

Final Decoration

Here I am experimenting with the aesthetics of my decorational item bags. The net is incredibly simple, which is cut and folded to create a simple bag. However due to the simplicity I think it is important to make sure the detail of the designs is just right. I think I am going to print these designs on a stock that is translucent, tracing paper for example, so that the consumer can see whats inside without opening the bag. Also I think this is a good idea because the items that are going inside the bags are colourful ones, mini smarties etc, which will only add to the vibrancy of the package. Due to the fact I want the bags to be translucent it means I should use white as the predominant colour. This way nothing will be printed in that area, ensuring a certain amount of visibility through the bag. Below are a few experiments with colour.